
Use this guide if you are installing for the first time, whether it is on a brand new computer or just a fresh install.
Important Notes:
- Occasionally the installer will need a restart to finish, please ensure your machine will be able to be restarted if necessary.
- If upgrading from an existing installation, see this guide.
- If you are running Food Processor on a 32-Bit operating system please contact support for an alternative installer.
- We recommend that you right-click "Run As Administrator" to install properly.
| If this is to be a stand-alone install (on a single computer with an unshared database), follow the 'Typical' path below. If this is for a multi-user environment, or you wish to put the database on a server or another shared location, follow the 'Custom' path below. |
Note: When the installation starts, you may be met with a small black window. Don’t be alarmed! This is normal and usually runs in the background. The installer should launch within a minute or two.
- Launch the installer. If you have questions about obtaining the installation file(s), contact support.
- Accept Terms to License Agreement and Select Install Location (Default is C:\Program Files (x86)\ESHA Research\FoodProSQL).
- Click Next.
- Enter in Customer Number and Serial Key. A green checkmark should appear and let you proceed.
- Click Next
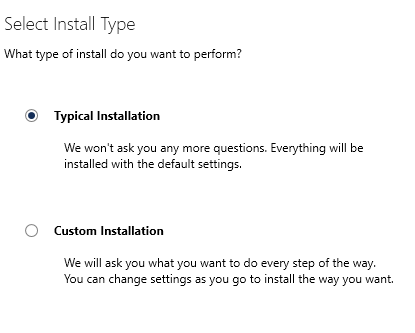
- Choose which type of install you want to do:
- Typical: Stand Alone Install (Single Computer Non-Shared Database)
- Custom: Shared Install (Option for Host Install or Client Install) (more information below)
For a Typical Installation, the standalone database will be named (localdb)\v11.0
Typical Installation Steps
- After selecting Typical Installation, click Next. You will see a Summary Page.
- Click Next.
- Click Finish.
Custom Installation Steps
Use this for a first-time setup to create a shared database with SQL Express. If you already have an instance of SQL Server hosting the database and only need to install the Food Processor client, see "Installing Food Processor to connect to the existing shared database" further down this page.
NOTE: You may need to allow Exceptions in Windows Firewall to allow remote connectivity
- After selecting Custom Installation, click Next.
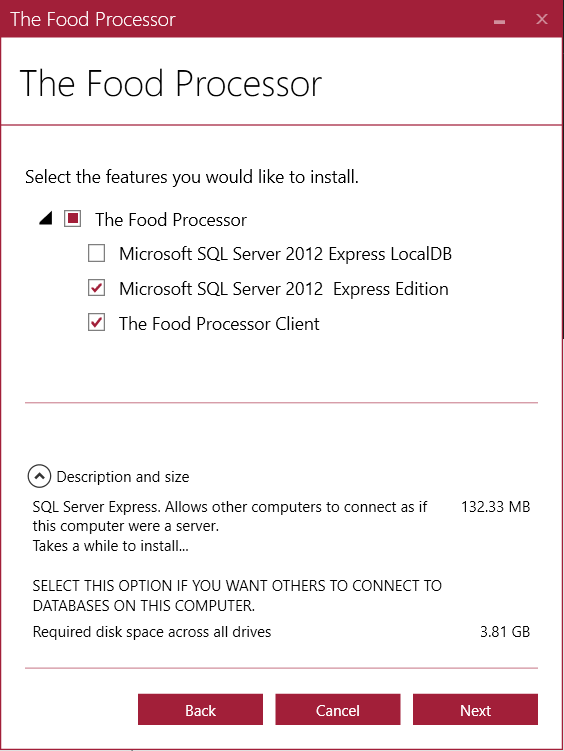
- Next to Food Processor click the arrow to expand options.
- Select the Product dropdown and choose which options you wish to install:
- SQL Server Express 2012 (For Database Host Shared Installs)
- Food Processor Client (optional on the server)
- After option(s) are selected Click Next.
- Review the Summary page.
- Click Install.
NOTE: to grant access to multiple users, you will need to explicitly add their Active Directory logins (or an AD Group) to the database. To do so, you may use ESHA's Database Utility or SQL Server Management Studio
Installing Food Processor to connect to the existing shared database
Please note the logged-in user performing the installation must be granted access to the database to complete the connection tests. To do so, you may use ESHA's Database Utility, or SQL Server Management Studio
- After selecting Custom Installation, click Next.
- Next to Food Processor click the arrow to expand options.
- Select the Food Processor Client only.
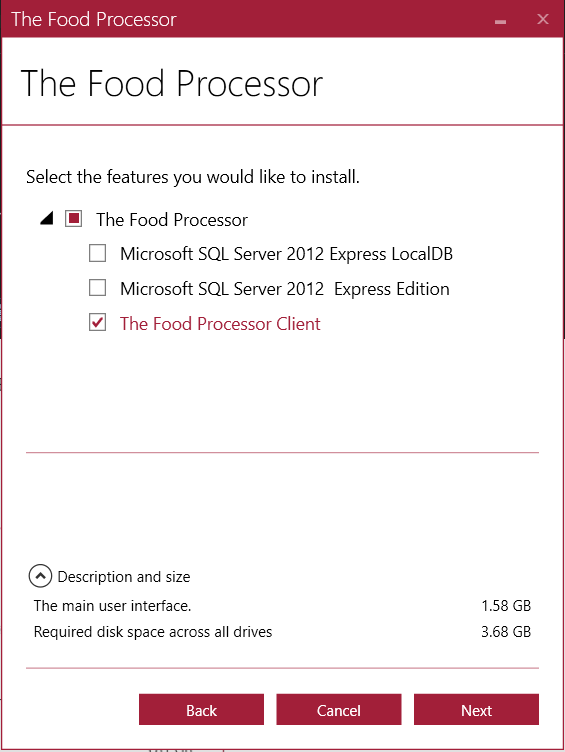
- Click Next.
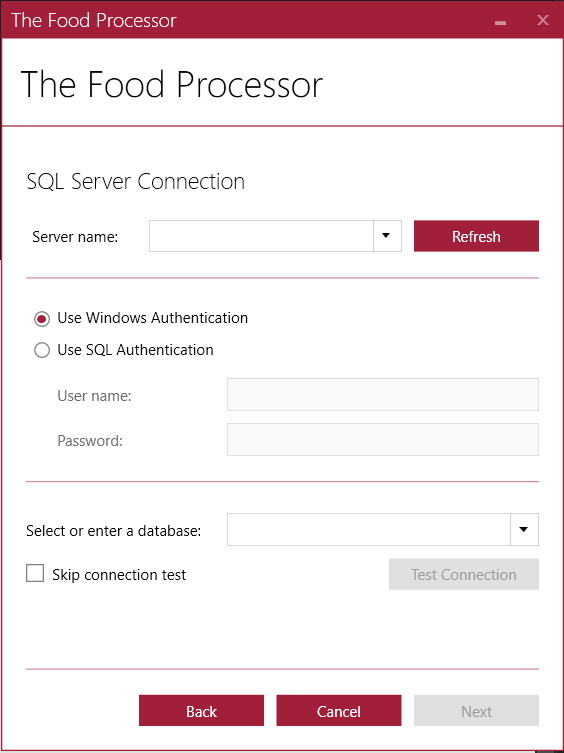
- Enter the existing SQL Server Name, select the authentication method, choose the database (typically 'eshadata'), and complete the connection tests.
NOTE: If you set up the shared database using ESHA's installer for SQL Server (above), the Server Name will be the server's name\ESHA (e.g. CORPSERVER\ESHA).
- After option(s) are selected Click Next.
- Review the Summary page.
- Click Install.
Comments
0 comments
Please sign in to leave a comment.